Chicken Curry is my comfort food. For as long as I can remember, I have loved chicken curry, my mom made it for me when I was living at home, my brother and I would fight over the wings, and when I went to university, I taught myself how to make chicken curry out of sheer desperation. It took me about 5 years to really perfect this recipe, it is quite different to my mom’s, but it still tastes really good.
Of course, there are lots of ways to vary this recipe, you can add coconut cream/milk to make a more Malaysian style curry, you could use lemongrass and lime instead of the curry powder to make a more Thai style curry. This chicken curry recipe is now on my “Good-for-weekly-packed-lunches” list. Every Sunday, I do a big cook up, make enough food in one pot to last Ben and I the whole week in lunches. Yes, it can be repetitive, but we are only eating the same thing for lunches for one week, it will be something different the next week. While it would be nice to eat something different every day, that is really just unaffordable for your average family, particularly living in Australia. I make sure that we eat something different for dinners, and every night is a different meal.
I typically pack my chicken curry with white jasmine rice, but if I am eating at home, I will cook some of the Katoomba Roti Parathas to accompany my curry. The Parathas really soak up the curry, which is really tasty. You can get these from Costco, or any Indian Grocery Store.
I can hear you Masterchef buffs scoffing – what?! She didn’t make the parathas herself?! Come on guys, I am a young professional. I have a husband and a young, demanding, ugg boot chewing puppy! I don’t have time to make my own Parathas – I barely have time to make it to the gym to burn off all this food that I keep cooking up and eating!
Total Prep and Cooking Time: 1 hour (if you are good at time management and multi-tasking)
Note: I use Baba’s meat curry powder in my curries, you can find these packets in any Indian grocery and some Asian grocery stores. Make sure you get the green meat packet for chicken, beef and lamb curries, and the yellow one for fish and prawn curries. Pictured below:

Source: Adapted from my mom’s instructions over the phone, and then tweaked for personal preference
Serves: My recipe uses 2 kg of chicken to make 10 lunches.
Ingredients
3 tbsp of vegetable oil or butter
½ stick cinnamon
5 cloves
1 star anise
1 tsp fennel seeds
1 tsp cumin seeds
1 large red onion (fine dice)
5 cloves garlic (crush first to remove skin and get juices running, then fine dice / mince)
2 tomatoes (large dice – 1 half tomato cut into 6 pieces)
2 tbsp Baba’s meat curry powder (heaped)
2 tsp chilli powder
Water
2kg chicken three joint wings (cut wings into 3 sections, discard the wing tip, you are left with the drumstick and the wing)
Salt and pepper to taste
Jasmine rice to serve (1 cup rice to 1.5 cups water)
Instructions
- Hot pan, oil/butter in first with all spices. Fry in pan until spices become aromatic.
- Put onion, garlic and tomatoes in next, fry off until skin is peeling away from tomatoes and flesh of tomatoes becomes soft and gooey. Keep an eye on the pan during this phase, ensure you are scraping the bottom of the pan every so often to ensure it’s not burning. Onions and garlic should become translucent.
- Put curry powder and chilli powder in with approx. 250 ml water (what am I saying, I never measure out the water. Put enough water in the pan that all powders dissolve and almost covers the onion and tomatoes). Cook down until you see bubbles on the surface of the curry paste. Stir at this point (make sure you scrape the bottom of the pan) and then cook down again. Repeat until you can see the oil separate from the paste in the bubbles.
- Sometimes, I do blitz up the curry paste in the blender, it just looks more refined, and less rustic than if you had all the bits in their original form. Completely optional for you, if you do decide to do it, blitz away, then return to the pan.
- You can put your rice on in the rice cooker now.
- Put the chicken in to the pan, give it a toss to coat the chicken with the curry, add enough water to just cover the meat. Stir before covering the pan. Cook covered for 15 minutes.
- Add salt and pepper for taste. Cook for another 15 minutes uncovered. Cook for longer if you want a dryer curry, it won’t hurt the chicken.
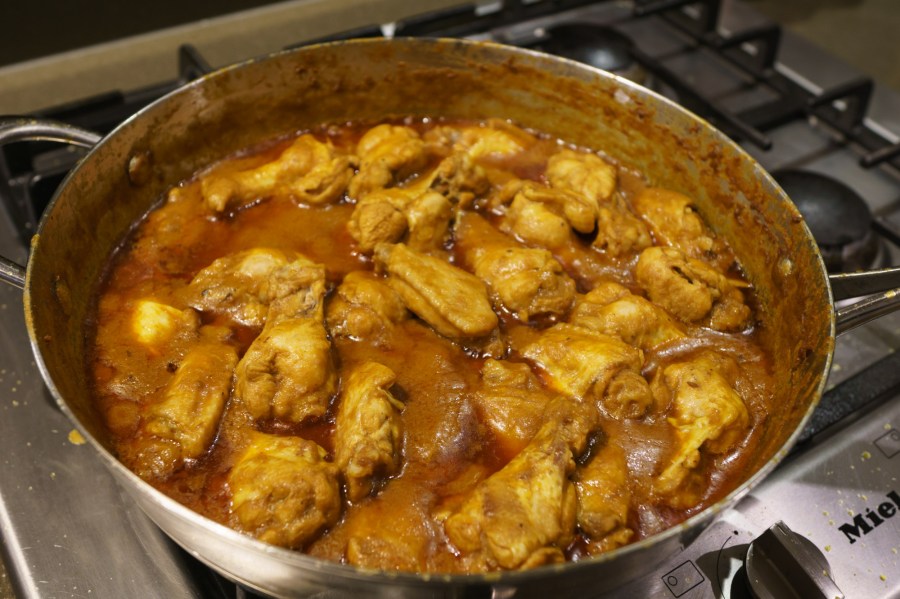
- The curry is now ready to be served.
